0 Cart
Added to Cart
    You have items in your cart
    You have 1 item in your cart
    Total

    Wild Blog — Recipes

    How To Cold Brew Coffee

    ​If you don't know how awesome cold brew coffee is, you are missing out.

    (And a great place to get your first taste is with our Wild Cold Brew brew-at-home pouches.)

    Cold Brew coffee is different than typical hot brewed coffee because it is brewed with cold water (duh). There are a few methods for doing this, but in our tests, we have found that using ice cold water and brewing for 24 hours in the fridge yields the best results.

    ​When you brew coffee using hot water, you get a fast extraction but at the cost of a more acidic cup of coffee due to the hot water pulling out more of the harsh components of the grounds--oils, acids and aromatic molecules.

    This results in a strong, acidic cup of coffee. For many, this acidic cup of coffee is too harsh to drink without sugar and/or cream.

    Enter Cold Brew Iced Coffee.

    For those who don't like black coffee, cold brew coffee might change your mind. The cold brew method produces a smooth, low acid and sweet cup of coffee. And when you pour it over ice, man-o-man, it is damn good!

    Brewing cold brew coffee is easy if you have the right tools and great coffee.

    What you'll need to cold brew coffee:
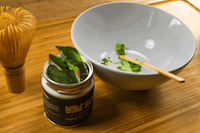
    • Pre-chilled glass container - (a Mason Jar or French Press works great)
    • 1 liter (34 ounces) of ice cold filtered water
    • 85g of fresh ground Wild Coffee beans ground to the size of thick grained sea salt/breadcrumbs
    • A method of straining the grounds; paper filter, fine-mesh strainer, french press
    How to Cold Brew Coffee Method:
    1. Grind coffee beans to a medium grind size
    2. Add grounds to glass container and pour in water
    3. Stir until all grounds are completely submerged
    4. Cover and place in fridge
    5. Optional: check after a few hours and stir to make sure all grounds are submerged
    6. After 24 hours, remove container from fridge and stir one last time
    7. Strain
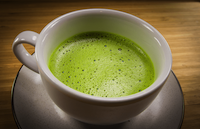
    8. Pour over ice and drink!
    9. ​Store remainder in sealed container and enjoy within a few days

    If you have yet to try cold brew coffee, I highly recommend you do. As with any cup of coffee, the better quality bean you use, the better cup of coffee you'll get.

    Trust us, you'll freaking love our whole bean Wild Coffee and Brew-At-Home kit. Cold brew can be a game-changer.

    Common Cold Brew Questions

    ​No one wants the experience of preparing your cold brew, waiting in eager anticipation of that first delicious sip, only to discover the whole batch is...well, kind of awful. Here’s a few common mistakes – what went wrong and how to avoid a bad batch.

    The Wrong Beans

    While the cold brew process can be more forgiving than say your typical drip brewed pot of coffee, good beans still matter. If you started with low quality, maybe even stale coffee beans, you’re most likely going to end up with a sub-par cup of joe.

    Always choose a high-quality, organic bean to brew and you’ll be setting yourself up for a better result. Of course we go with fair trade, non-GMO, always organic, small batch, and fresh roasted beans.

    And can you use decaf for cold brew? Absolutely!

    The Proper Cold Brew Grind

    If you’ve taken a taste and found your cold brew batch to be too bitter, consider the grind size you used. It’s too fine of a grind that leaves that extra bitter aftertaste in cold brew.

    Since your coffee is going to be steeping for many hours, choose a courser grind, something resembling the texture of sugar or sea salt is typically a good size.

    When It Comes To Water Temps - Just Chill

    A lot of people find themselves somewhat freaking out about what water temperature you must use for cold brew.

    Do I start with hot water or just go warm? Should I be adding ice before putting it in the fridge? And so on. Basically, it doesn’t have to be that complicated.

    Unless you’re the scientific type and want to do a taste-testing experiment, (since hot water can highlight different flavors in the coffee), just go with anything between room temp and fridge cold water for the best results.

    If you soak the coffee grinds for just 12 hours, you'll probably find your cold brew is weak and even somewhat astringent. Ideally let the brew sit in the fridge for 18 to 24 hours before straining. Then get ready for a smooth taste that was worth the wait!

    Don’t Be Too Strained About Straining

    When you’re waiting in such mouthwatering suspense, it can be tempting to race through the straining process, but trust us, don’t rush it.

    Unless you want bitter disappointment, do not poke, prod, or force your cold brew through the cheesecloth or strainer.

    This is a process, savor the experience. Be patient and your reward will be smooth and sweet.

    To Dilute Or Not To Dilute…?

    DO NOT DILUTE is the answer to the question.

    Your cold brew is meant to be stored in the refrigerator as a concentrate. Don’t water it down or it shortens its life (to a sad little 2-3 days). Note: If you’re not keeping your brew in the fridge, it can and most likely will mold.

    If stored properly (refrigerated) as an undiluted concentrate, although flavor quality typically starts to degrade after a week, your cold brew should last for about two weeks.​

    It’s only when you’re pouring up a glass and ready to drink it should you be diluting your cold brew.

    Frozen Coffee?

    Love your beverages a little extra on the arctic side? Try freezing up some coffee cubes.

    Just take an ice cube tray and pour in some leftover coffee. (And if leftover coffee is a foreign concept in your house, just brew an extra cup for this cool purpose.) Freeze those coffee cubes and use them in your next glass of extra-cold cold brew.

    ​So cold brew i​s not only a fun way to brew, it's a taste of the bean any coffee connoisseur should give a try!

    How To Make Cold Brew At Home With Our Fresh Cold Brew Pouches

    Some people know what cold brew coffee is and some don’t.

    Some love cold coffee (like we do) and some don’t. (They probably still like it though.)

    The thing about cold brew coffee is it is brewed cold or with room temperature water. This results in a less harsh form of extraction that extracts the coffee more slowly compared to the hot method that extracts fast and harsh.

    The gentle extraction results in a smoother cup of coffee.

    And you can taste the difference big time. Everyone can.

    But not all iced coffee is cold brew because some iced coffee is brewed hot then poured over ice or stored in fridge until it cools and then served cold. This is just hot coffee with ice in it.

    Not. Even. Close.

    Cold Brew wins every time.

    Icy cup of cold brew coffee

    But making cold brew can be a bit of a chore. If you look around Internet ​Land, you’ll find tutorials that call for a huge pot and a pound of ground coffee. Recipes then typically call for straining through cheese cloth or some other filter method.

    The fact is, most people don’t have the equipment or patience to make cold brew coffee the way it’s supposed to be made.

    The grind has to be just right and you have to use an exact amount of water. Your beans should be high-quality or your final cup isn’t going to taste that good.

    Then you have to strain it in the hopes you can get as much of the coffee in your cup with little to no coffee grounds making their way in as well.

    Instead of all that, try our Wild Cold Brew pouches!

    We take the guesswork and labor completely out of the equation. All you have to do is add water and our pouches to a jar and put in your fridge.

    That’s it.

    Then, the next day, you’ll have delicious and ready-to-drink cold brew coffee!

    Look below to see just how easy they are… and when you’re ready to get your cold brew fix going - Be sure to check out our store for all your supplement needs.

    ​Making Fresh Cold Brew With Our Wild Cold Brew Pouches

    1. ​​​​​​​​​Fill a mason jar with 24 oz of water.
    2. Place the pouch in the jar and seal (flip upside down to completely submerge pouch).
    3. Place covered jar in fridge for 18-24 hours.
    4. Remove from the fridge and the pouch from jar.
    5. Enjoy your freshly brewed Wild Cold Brew Coffee!

    How To Make Traditional Green Tea Matcha

    There are hundreds of methods of making matcha floating around the Internet. Some don't specify how much water to use and some do.

    Some suggest you have to sieve your matcha and some don't. Some tell you to make a thick paste first before adding more water and some add more water initially.

    I want you to keep this in mind should you come across a method that looks a bit different than the Wild method below.

    Luckily for you, the following method for preparing matcha is the result of testing the many methods I'm referring to. And not only have we done the testing for you, but we've also figured out the best way to make matcha while protecting matcha's benefits.

    You see, the first and foremost consideration to us at Wild Foods is preserving the quality of the matcha (or any ingredient).

    And as far as matcha goes,  if you are going to spend a healthy amount of money (pun intended) on a premium product such as Wild Matcha, you want to make sure you are getting every iota of nutrition out of it, right?

    Exactly.

    After nutrition, we want to produce the best tasting matcha experience possible. And lucky for us all, there's a way to make matcha taste delicious while still maintaining the nutritional integrity of the ingredient.

    Let's look at how to do that.

    But first, there's a rule of matcha that you should learn. It's this: matcha is extremely sensitive to heat and light. Never ever pour boiling water over matcha. (Or any green tea, for that matter.)

    Water that is too hot not only destroys the delicate nutrition in your matcha powder, but it also fails to bring out the the best umami flavor that is part of the matcha flavor experience while turning your beautiful matcha into a cup of liquid bitterness.

    This is why we recommend a maximum water temperature of 175°, with 165° being then ideal temperature for preparing matcha.

    Another thing I see lacking in matcha recipes around the world wide web is exact measurements. I like exact measurements. I like to know, by weight, how much of an ingredient I should be using.

    This probably comes from my coffee and espresso disciplines, but either way, our method requires a scale and a thermometer to get everything just right. These are essential kitchen tools and you should invest in each.

    The last point I want to make about preparing matcha relates to cold water. Some Japanese tea masters only use cold water to prepare their matcha because they feel it brings out the best umami flavor. We are going to use a hybrid of this recommendation to make our matcha.

    Using cold water in the initial water pour is not just for umami, it's also for protecting the matcha from the hot water you are going to use to finish the drink.

    Wild Foods Ceremonial Grade Matcha Teas

    I'm not going to take credit for this technique, and I actually don't remember where I read it initially, but I do remember it making so much sense to me that I knew I was going to use this step in my matcha method from then on.

    ​Alright, let's make some Wild Matcha!

    How To Make Matcha Tea
    The Wild Method

    ​Ratio used: 1.5g matcha (~1/2 tsp) to 4 ounce water (113g)

    Need:

    • Premium matcha meant for drinking - Wild Matcha
    • Bowl
    • Bamboo Whisk or Handheld frother
    • TSP or matcha chashaku ladle
    • 6 ounces 165° filtered water
    • Optional: small wire sieve

    Process:

    ​1. Pour 2 ounces hot water into your bowl to preheat for a minute

    ​2. Discard water and wipe dry

    ​3. Place bowl on scale and tare

    4. Add 1.5g matcha - about 1 and a half chashaku ladle scoops

    4a. Choose: Sift matcha through sieve into bowl or take bamboo whisk or frother and gently flatten out the matcha. You want to remove clumps.

    5. Pour 1 ounce (28g) cold water over matcha (This helps protect the matcha from the hot water in step 7)

    6. Use your whisk in a circular motion to make a thick paste

    7. After all matcha is incorporated, add 3 ounces of 165° water

    8. If using bamboo whisk: whisk matcha using a "W" and "M" path up and down utilizing your wrist. If using a electric frother: place it at the bottom of the bowl and start with short pulses to make sure you don't spill any precious matcha.

    9. Whisk until frothy and you have a nice white crema with small bubbles

    10. It is now ready to drink! You can stir in some honey or preferred sweetener or add steamed milk for a matcha latte. You can also add more water to increase the yield (it will dilute) or can finish with cream or frothed milk.

    ​Once learning how matcha is made, many assume you can take any green tea and grind it into a matcha powder, but that's not the case.

    Matcha is a specialty grown tea requiring a specific climate, lots of labor and an expert farmer who is experienced in tea growing for this specific type.

    This is why high quality matcha is ​always expensive and difficult to find; there is no good way to cheaply produce matcha.

    ​​​With Wild Matcha we ensure that you are getting the highest quality at the lowest possible price. Here's to your health!​​​